When asking, “why is my automated plate shifter jamming,” start with the machine’s symptoms, not assumptions. A sudden stop may come from misaligned plates, excessive load, worn guides, or a sensor that no longer reads accurately. In real maintenance work, small details matter. A scraping sound, uneven movement, or a plate stopping halfway can reveal more than an error code.
This guide examines common causes through practical inspection and mechanical reasoning. It considers plate alignment, actuator condition, guide-rail cleanliness, air pressure, electrical signals, and control settings. A thin layer of dust can increase friction. A bent guide may look harmless but create repeated stalls. Sometimes, the settings are blamed too quickly. The actual problem may be a loose fastener hidden behind the access panel.
Not every jam has one clear cause. That is worth admitting. Troubleshooting can involve missed clues, incomplete maintenance records, or a diagnosis that seemed correct at first. A careful technician should document each observation, isolate the equipment safely, and follow the manufacturer’s service instructions. Never force the shifter by hand or bypass protective controls. Those shortcuts can damage components and create serious hazards. By combining operating experience with structured checks, you can identify the source more reliably and decide whether adjustment, cleaning, part replacement, or professional service is appropriate. The goal is not merely to restart the machine. It is to prevent the same jam from returning during the next production cycle.
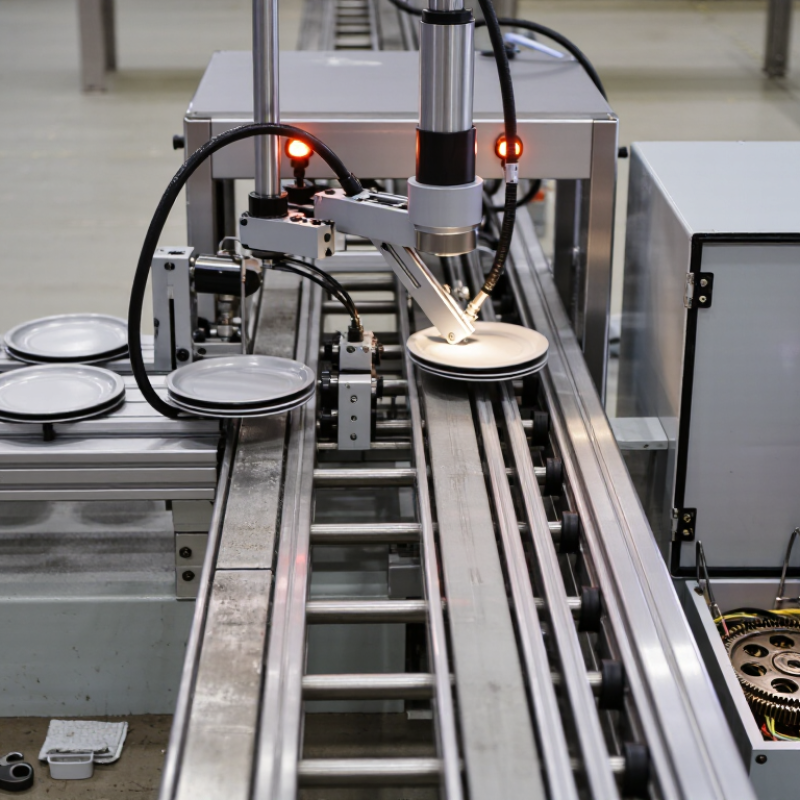
An automated plate shifter usually jams when movement resistance exceeds the drive system’s available force. Technicians often find dried process residue, dust, or small metal fragments on guide rails. Even a thin film can increase friction around rollers and sliding surfaces. Inspect the rails, rollers, and plate edges after stopping the equipment safely. Small particles hide easily. Clean with an approved method, then check whether lubrication is suitable for the operating environment.
Misalignment is another frequent cause. An uneven frame, bent guide, or loose mounting bolt can force the plate sideways. This pressure may appear only during the final part of travel. Check the plate path with a straightedge and verify equal clearance on both sides. Incorrect plate spacing can also confuse position sensors. A common troubleshooting mistake is blaming the motor too early. The motor may be responding correctly to excessive resistance.
Drive problems can appear mechanical but begin with control settings. A worn coupling, slipping belt, or damaged gearbox can reduce pushing force. Sensor timing errors may stop the shifter before it reaches its position. Review fault records, sensor alignment, and travel limits. Power should be isolated before hands enter the mechanism. Never force a jammed plate. That can bend guides and create a second failure. Some inspections are easy to rush, and that is where small alignment errors are often missed.
Why Is My Automated Plate Shifter Jamming?
How to Identify the Source of the Jam
A jam rarely begins with the plate itself. In my experience, misalignment is more common than motor failure. Turn off the system before touching the transport path. Remove the plate carefully, then inspect the entry rails, transfer arm, and receiving position. Look for dried liquid, a loose label, or a plate sitting slightly off-center. Even a small obstruction can create repeated stops.
Listen during a normal cycle. A sharp click may indicate contact with a rail or guide. A slow hum with no movement can suggest excessive resistance or a drive problem. Check whether the jam occurs during pickup, transfer, or placement. This location narrows the search. I once blamed the motor too quickly. The actual cause was a warped plate lid catching under a guide.
Review recent changes as well. New plate types, altered stack heights, or cleaning methods can affect clearance. Compare the problem plate with one that moves correctly. Measure visible gaps if the equipment manual provides acceptable limits. Do not force the mechanism; that can bend alignment parts and hide the original fault. If the path looks clear but the fault repeats, record the cycle stage, sound, plate type, and error message for qualified service personnel. My diagnosis is not always right on the first attempt. Careful notes usually reveal what rushed inspection misses.
A jam usually leaves physical clues. Stop the cycle, isolate the power, and follow your site’s lockout procedure. Never reach into the mechanism while stored energy remains. Check the transfer path with a flashlight. Look for bent plate edges, loose fragments, or material packed beneath the guide rails. Even a small burr can change the plate’s travel.
Inspect the grippers, rollers, and guide surfaces by hand only after confirming zero movement. They should move smoothly without scraping or sideways play. Measure the gap between the plate and each guide. Uneven clearance often points to a shifted bracket or worn bearing. Clean dry debris with a suitable brush, not compressed air near sensors. Then examine sensor faces and cable connections. A dusty sensor may report the wrong position.
My first assumption was often misalignment. Sometimes the real fault was a weak return spring or an over-tightened fastener. Check the spring length, fastener condition, and drive coupling against the equipment manual. Review the last successful cycle and note where resistance begins. Do not bypass an interlock to “test” the machine. That shortcut can hide a serious fault. After correction, run a slow empty cycle, then test one plate. Watch the leading edge closely. Record the fault, measurement, and repair; vague notes make the next inspection harder.
Why Is My Automated Plate Shifter Jamming?
A jam often begins with a small alignment error. A plate may sit unevenly, a stack may lean, or dried residue may restrict movement. Stop the cycle immediately when resistance appears. Do not pull the plate by force. Pause the system, isolate its power according to the operating procedure, and wear suitable eye and hand protection. Confirm that moving parts have fully stopped before opening the access area.
Clear the obstruction with a gentle, controlled motion. Use the approved tool from the equipment manual, not a sharp improvised object. Check the gripper, rails, plate carrier, and sensor path for fragments or spills. A cracked plate requires careful removal and proper disposal under your laboratory rules. Never reach into a moving mechanism. If the plate remains trapped, record the error and contact trained service personnel.
Prevention depends on simple habits. Load plates squarely, keep stacks below the stated limit, and inspect them for warping before use. Clean approved contact surfaces with compatible materials, since excess liquid can damage sensors. Review speed, grip force, and spacing settings after changing plate types. I once blamed the motor for repeated jams, but the real problem was inconsistent loading. That mistake changed our checks. Keep a short jam log, including plate type, position, and error message. Patterns may reveal a setup issue before it becomes a mechanical failure. Test the machine with an empty cycle after clearing a jam. Small checks matter.
Common jam triggers and the number of preventive checks recommended per 100 operating cycles.
Misalignment, debris buildup, worn guides, blocked sensors, and excessive loading are frequent contributors to plate-shifter jams. Before clearing a jam, stop the equipment, isolate all hazardous energy, verify zero movement, and use the approved clearing tool rather than reaching into the mechanism.
An automated plate shifter usually jams because movement becomes uneven. Check guide rails, belts, bearings, sensors, and pneumatic grippers first. Dust, dried lubricant, or a slightly bent plate can create sudden resistance. A jam is a symptom, not a diagnosis.
Repair makes sense when the frame remains square and the motor runs smoothly. Replace worn bearings, cracked belts, damaged rollers, or unreliable sensors when their tolerances exceed the service manual’s limits.
The U.S. Department of Energy’s Operations & Maintenance Best Practices Guide reports that predictive maintenance can reduce breakdowns by 70–75% and maintenance costs by 25–30%.
That supports condition-based decisions, not automatic part replacement.
Replacement becomes safer when the same jam returns after cleaning and alignment. Repeated motor overloads, excessive shaft play, or hidden frame distortion usually indicate deeper wear.
Plant Engineering’s 2023 Maintenance Study identifies preventive maintenance as the dominant strategy across surveyed facilities, while predictive practices remain less common. That gap matters. A low-cost repair may only postpone failure.
During inspection, record vibration, motor current, cycle time, and jam location. Small trends often reveal trouble earlier than alarms.
Still, readings can mislead when sensors are dirty or poorly calibrated. Check the basics again.
Excessive resistance can exceed the drive system’s available force. Dried residue, dust, or metal fragments may increase friction. Even a thin film matters.
Stop and isolate the equipment before inspection. Use a straightedge to check the frame and guides. Measure clearance on both sides. Uneven gaps suggest a shifted bracket, bent guide, or worn bearing.
Yes. The motor may respond normally while resistance blocks movement. Check rails, rollers, couplings, belts, and gearboxes before blaming the motor.
Look for bent plate edges, loose fragments, and packed material under the rails. Check grippers, rollers, springs, sensors, and cable connections. A small burr can change the travel path.
Stop the cycle and isolate power under the site procedure. Confirm that stored energy is released. Never reach into moving parts or bypass an interlock.Safety comes first.
Dust on the sensor face may create an incorrect position signal. Inspect sensor alignment and cables after cleaning the area. Use a suitable brush near sensors, not compressed air.
Use only the approved tool and a controlled motion. Do not pull the plate forcefully or use improvised sharp objects. If it remains trapped, contact trained service personnel.
Load plates squarely and keep stacks below the stated limit. Check for warping before use. Review spacing, speed, and grip settings after changing plate types.Small checks matter.
Run a slow empty cycle first. Then test one plate and watch its leading edge closely. Record the fault, position, measurements, and repair. My first assumption was sometimes wrong, so the log should remain honest.
If you are wondering, “why is my automated plate shifter jamming,” the problem may result from several common issues, including misaligned plates, excessive debris, worn guides, incorrect pressure, loose fasteners, or a sensor that is not detecting plate position accurately. Identifying the source begins with observing when the jam occurs: during loading, shifting, clamping, or release. This can help narrow the problem to a mechanical, electrical, or operational cause.
A safe inspection should begin by stopping the equipment, disconnecting its power, and following applicable safety procedures. Check the plate path, guides, rollers, clamps, sensors, and drive components for obstruction, damage, or unusual wear. Never force a jammed part while the system is energized. After carefully removing the obstruction, clean the working area, realign components, and test the shifter at low speed. Regular cleaning, lubrication where appropriate, and scheduled inspections can prevent repeated jams. If components remain damaged, misaligned, or unreliable after adjustment, professional repair or replacement may be necessary.

Jovios Equipment